Guida passo passo all'installazione di una parete verde artificiale
Sei pronto a installare una parete verde artificiale? Questa guida ti fornirà gli strumenti necessari, consigli per la scelta dei pannelli e istruzioni dettagliate per un'installazione perfetta.
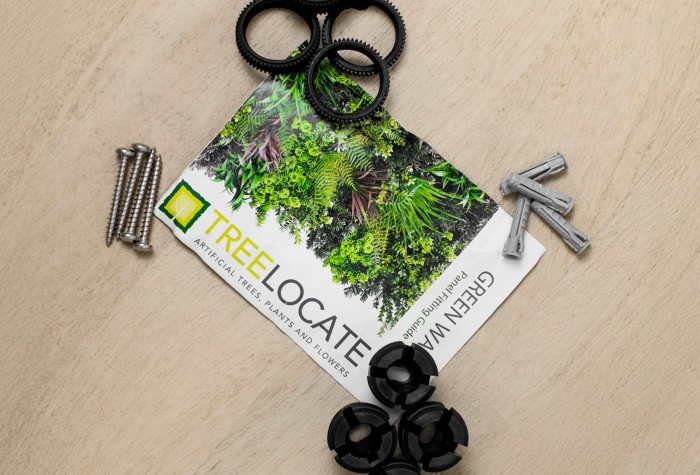
Strumenti e materiali indispensabili
Prima di iniziare l'installazione, procurati tutti gli attrezzi e i materiali necessari. Alcuni pannelli TreeLocate sono forniti con un pratico kit di installazione, ma anche in caso contrario, tutto ciò che ti serve è facilmente reperibile. Il bello dell'installazione delle pareti verdi artificiali sta proprio nella sua semplicità: non sono necessari attrezzi specializzati, il che lo rende un progetto alla portata degli appassionati del fai da te. Ti serviranno:
- un trapano
- viti per legno
- rondelle
- una livella a bolla
- Tagliacavi
Le rondelle sono fondamentali perché impediscono ai pannelli della parete verde di scivolare, garantendo così la stabilità.
Sono inoltre necessari una taglierina o un coltello affilato per tagliare i pannelli su misura, consentendo di adattarli al tuo spazio specifico. Con questi semplici strumenti, potrai concentrarti sugli aspetti creativi del tuo progetto senza doverti preoccupare di attrezzature complesse.
Procurarti questi attrezzi in anticipo semplificherà l'installazione, permettendoti di concentrarti sulla trasformazione del tuo spazio con una vegetazione rigogliosa e rigogliosa.
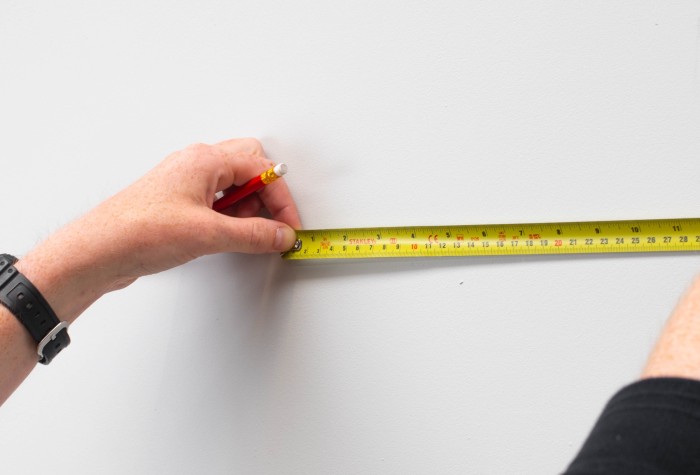
Misurare il proprio spazio
Per garantire il successo dell'installazione di una parete verde, è fondamentale effettuare misurazioni accurate. Inizia con:
- Per calcolare la superficie dei pannelli per la parete verde artificiale, moltiplica la lunghezza e l'altezza della parete per ottenere la metratura.
- Da notare che i pannelli per pareti verdi di TreeLocate sono disponibili in comode dimensioni di 1 m x 1 m.
- Utilizza queste misure per calcolare quanti pannelli ti serviranno. Il nostro team sarà lieto di aiutarti in caso di necessità.
In caso di pareti dalle forme irregolari o complesse, rivolgersi a un professionista garantisce misurazioni precise. Una corretta disposizione e un corretto allineamento fin dall'inizio consentono di risparmiare tempo e fatica, assicurando una finitura impeccabile.
Scegliere i pannelli giusti
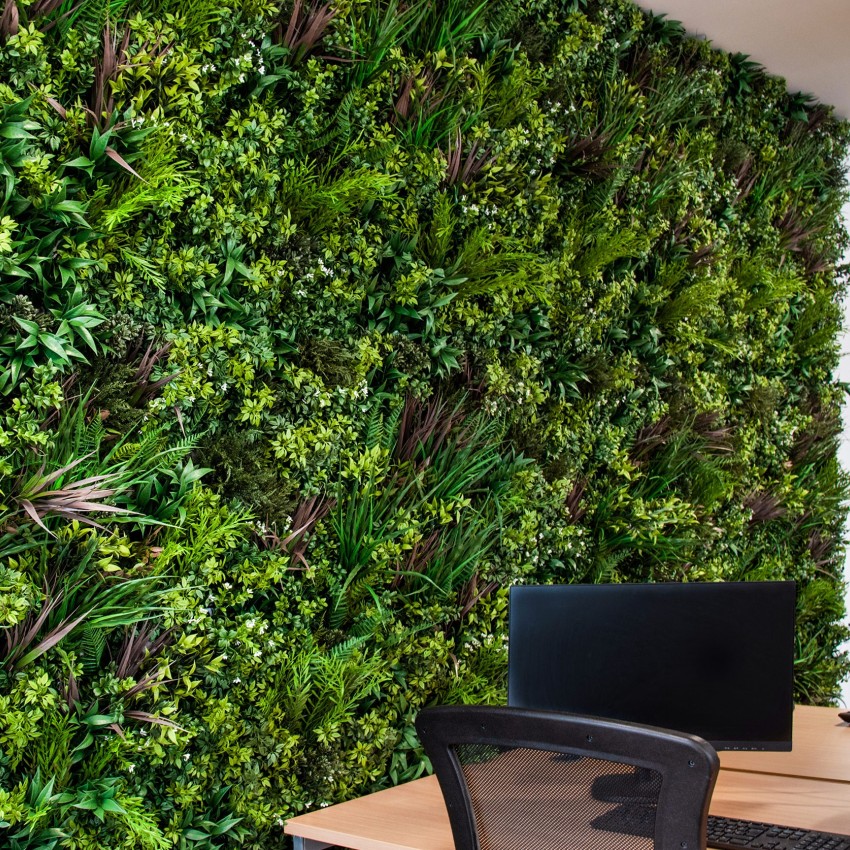
La scelta dei pannelli giusti è fondamentale per ottenere l'effetto estetico desiderato. I pannelli per pareti verdi artificiali presentano le seguenti caratteristiche:
- Una vasta gamma di stili, dai look tropicali esuberanti ai design minimalisti, ti permette di creare effetti visivi molto diversi tra loro
- Versatilità: adatto sia per uso interno che esterno
- Le opzioni ignifughe FireSilx sono disponibili per i casi in cui la sicurezza antincendio è fondamentale.
- Le opzioni di pannelli UVSilx a colori stabili, realizzate con fogliame UVSilx resistente ai raggi UV, mantengono il loro aspetto anche sotto la luce diretta del sole.
Tieni conto della tua visione progettuale e della luce naturale che illumina lo spazio. Questi fattori influenzeranno la scelta delle varietà e dei colori delle piante, aiutandoti a ottenere il risultato perfetto. Le piante artificiali possono essere collocate in punti difficili, dove sarebbe complicato prendersi cura di quelle vere.
I pannelli giusti valorizzeranno l'aspetto estetico del tuo spazio, garantendo al contempo resistenza e uno stile che richiede poca manutenzione, oltre a proteggere dal sole e a mantenere il colore e la struttura.
Preparazione della superficie della parete
Comprendere il tipo di parete su cui si sta effettuando l'installazione e prepararne adeguatamente la superficie garantisce un fissaggio sicuro dei pannelli per pareti verdi, senza necessità di modifiche strutturali. A seconda del tipo di parete, sono richiesti diversi metodi di montaggio:
- Per superfici in cartongesso, cemento o mattoni: utilizzare tasselli in nylon.
- Per il legno: utilizzare viti da legno o, in alcuni casi, graffette da fissare direttamente nel legno.
Quando si fissano i pannelli su pareti in muratura o in cartongesso, utilizzare elementi di fissaggio adeguati e fissarli a 20 cm da ciascun angolo, in modo da garantire la stabilità. Se si installa un pannello con retro flessibile, su superfici in legno potrebbe essere sufficiente una graffatrice, mentre per il fissaggio su recinzioni metalliche è possibile utilizzare fascette o legacci metallici. Scegliere sempre un punto di partenza che eviti la presenza di quadri elettrici o punti di accesso.
Una preparazione adeguata garantisce che la vostra parete verde artificiale rimanga saldamente al suo posto, assicurandovi una parete decorativa bella e duratura.
Procedura di installazione passo dopo passo
L'installazione di una parete verde artificiale è semplice, soprattutto se si prestano attenzione all'allineamento e alla spaziatura. Il procedimento è piuttosto semplice e può essere eseguito con attrezzi di base. Un corretto allineamento e una corretta spaziatura sono fondamentali per realizzare una splendida parete verde con i pannelli TreeLocate.
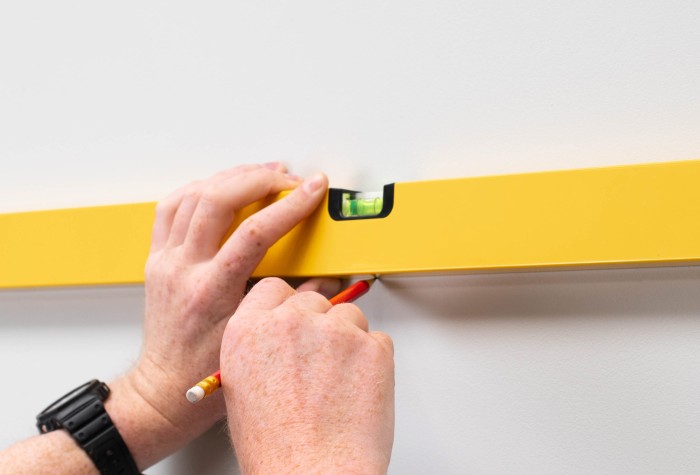
Le istruzioni dettagliate ti aiuteranno a ottenere un risultato dall'aspetto professionale. Inizia scegliendo il punto di partenza giusto e utilizzando una livella a bolla per un allineamento perfetto.
Punto di partenza
Inizia dall'angolo superiore della parete, a sinistra o a destra. Usa una livella a bolla o un filo a gesso per tracciare l'allineamento, assicurandoti che l'installazione risulti diritta. Questo primo passo è fondamentale per il resto del processo.
Una volta stabilito dove posizionare il primo pannello, segna il centro del pannello sulla parete e traccia una linea centrale. Usa una livella a bolla per tracciare una linea retta in orizzontale e misura lungo questa linea 30 cm su ciascun lato della linea centrale. Da questi segni, usa la livella per tracciare linee verticali e misura 60 cm verso il basso. In questo modo avrai segnato i punti a 20 cm dall'angolo del pannello da 1 m x 1 m in cui verrà installato il pannello.
Se hai intenzione di aggiungere più di un pannello, a questo punto dovresti prolungare le linee che hai tracciato lungo tutto lo spazio, segnando man mano ogni punto di fissaggio.
Fissaggio del primo pannello
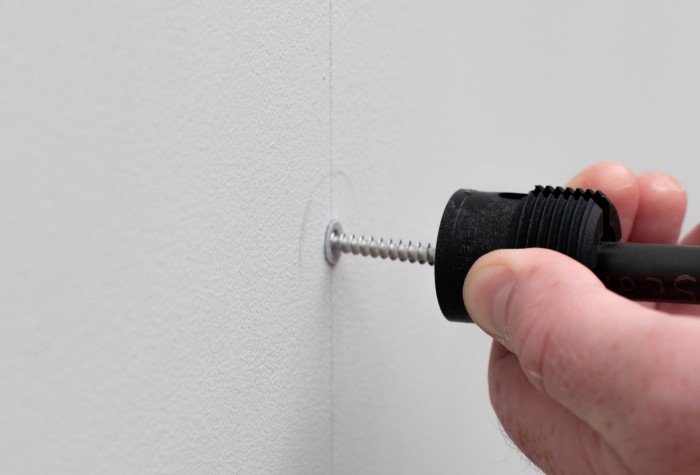
Utilizzando una punta da trapano da 6 mm (a meno che non si tratti di fissaggio su legno), praticare dei fori nella superficie della parete alla profondità richiesta, seguendo le istruzioni riportate sulla confezione dei tasselli. Al termine, dovresti avere quattro fori.
Inserisci i tasselli in ciascuno dei fori che hai appena praticato e martellali fino a farli aderire perfettamente alla superficie.
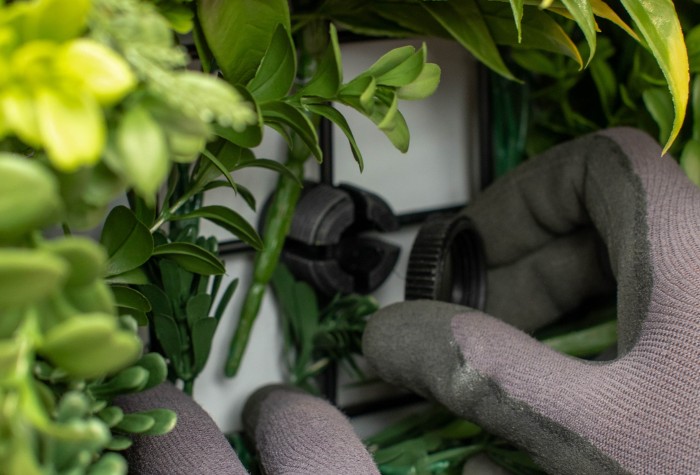
Se si installano i pannelli TreeLocate con supporto in rete metallica, la parete verde verrà fornita con un pratico kit di montaggio. Utilizzando il kit, fissare alla parete la staffa di sostegno della parete verde.
Posizionare il pannello sui supporti e fissarlo in posizione con la vite di fissaggio della staffa.
Avere qualcuno che tenga fermi i pannelli della parete verde mentre li fissi può rendere l'operazione più semplice ed efficiente. In questo modo potrai anche fissarne due contemporaneamente.
Se non si dispone di un kit di montaggio, posizionare il pannello e fissarlo alla parete con una vite e una rondella. Iniziare dalla parte superiore renderà l'operazione più semplice.
Se state installando una parete verde con sistema Flexi Back e la state fissando su compensato o altro tipo di legno, le graffette sono un ottimo modo per garantire un'installazione rapida ma affidabile. Un'altra ottima opzione è quella di utilizzare viti per legno e rondelle per fissare saldamente il pannello alla parete.
Collegamento di pannelli aggiuntivi
Posiziona i pannelli aggiuntivi uno accanto all'altro per evitare spazi vuoti e assicurarti che le piante collegate non si aggroviglino. Se hai già tracciato i segni sulla parete e le tue misure sono corrette, non dovrebbero esserci problemi. Tuttavia, è sempre bene controllare il pannello successivo man mano che procedi, per assicurarti che i segni siano corretti. L'obiettivo è ottenere un effetto omogeneo.
Il metodo migliore è procedere dall'ultima fila verso il basso. È necessario completare l'installazione della prima fila e solo dopo procedere con l'installazione del pannello successivo nella seconda fila sottostante.
Questo metodo garantisce che la tua parete verde appaia omogenea e installata a regola d'arte, valorizzando l'estetica complessiva e creando un effetto senza soluzione di continuità.
Personalizzazione delle dimensioni dei pannelli
Adattare le dimensioni dei pannelli è incredibilmente facile utilizzando un taglierino o delle cesoie da giardino per ottenere un taglio netto (nel caso di pannelli in rete plastica con supporto flessibile) oppure delle pinze tagliafili se si utilizzano modelli con supporto in rete metallica. Tracciare le linee di taglio con un pennarello o del gesso per ottenere tagli precisi.
Prima di procedere al taglio, controllare che i pannelli non presentino punti deboli, per evitare di danneggiare il fogliame. In questo modo si garantisce una copertura perfettamente adattata a spazi e forme particolari.
Ultimi ritocchi
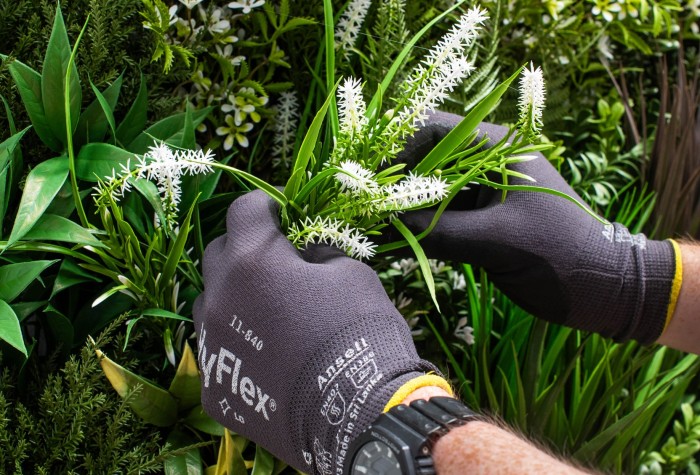
Una volta installati tutti i pannelli, concentrati sugli ultimi ritocchi. Scompiglia il fogliame per migliorarne l'aspetto e sistema delicatamente foglie e rami per ottenere un effetto più naturale. Assicurati inoltre che non ci siano buchi nelle piante e nel fogliame, altrimenti il risultato sembrerà poco realistico.
Posiziona i pannelli adiacenti uno vicino all'altro per evitare spazi vuoti e mantenere una distanza uniforme. Queste regolazioni finali conferiscono un aspetto curato e omogeneo, rendendo la tua parete verde perfettamente uniforme e dall'aspetto professionale. Assicurati di sfumare le linee di giunzione in modo che i vari pannelli sembrino un unico rivestimento continuo.
Manutenzione della parete verde artificiale
La manutenzione della tua parete verde artificiale è semplice e richiede uno sforzo minimo. Per le pareti interne, rimuovi regolarmente la polvere con un piumino o passaci sopra un panno umido per mantenerne l'aspetto fresco.
Per pulire le pareti esterne, usa un tubo flessibile con ugello nebulizzatore oppure lascia che sia la pioggia a pulire i pannelli. Questi accorgimenti garantiscono che la tua parete verde e il suo fogliame rimangano rigogliosi e belli con una manutenzione minima.
Servizi di installazione professionali
I servizi di installazione professionale come quelli offerti da TreeLocate rappresentano un'ottima soluzione per chi preferisce non occuparsene direttamente. Un'installazione eseguita da esperti garantisce un risultato di grande effetto e un corretto allineamento.
I servizi professionali comprendono spesso un sopralluogo iniziale per adattare la parete verde alle esigenze del vostro progetto, con un team di esperti che si occupa dell'intero processo di installazione.
Scopri altre opzioni
Oltre alle pareti verdi artificiali, esistono altre soluzioni per schermare la vista, come i tralicci espandibili e le siepi artificiali. Questi elementi possono integrare la vostra parete verde, aggiungendo vegetazione verticale e garantendo una maggiore privacy.
Queste soluzioni versatili possono essere personalizzate in termini di dimensioni e forma per adattarsi a diversi spazi. Valorizzate gli ambienti interni ed esterni con questi sistemi moderni che richiedono poca manutenzione; in alternativa, create un look armonioso ed esteticamente gradevole.
Sintesi
In sintesi, l'installazione di una parete verde artificiale richiede di procurarsi gli attrezzi necessari, misurare con precisione lo spazio a disposizione, scegliere i pannelli giusti, preparare la superficie della parete, seguire una procedura di installazione passo dopo passo, personalizzare le dimensioni dei pannelli e dare gli ultimi ritocchi. Una manutenzione regolare garantisce che la parete verde rimanga rigogliosa e attraente. Per chi preferisce rivolgersi a dei professionisti, servizi come TreeLocate offrono un'installazione a regola d'arte.
Trasforma i tuoi spazi con pareti verdi artificiali e goditi la bellezza della natura senza il fastidio della manutenzione. Dai libero sfogo alla tua creatività e crea un effetto visivo mozzafiato che lascerà un ricordo indelebile.